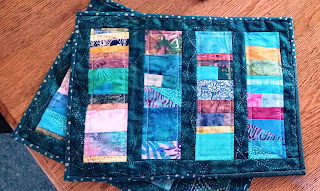
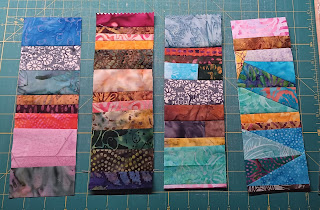
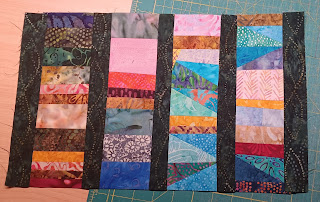
Today I've been busy making two more and taking closer note of what is required. I would very much appreciate it if you ladies would look over things and maybe even try making one or two and then giving me some feed back.
Requirements to make one mat
Grocery receipts, 4 pieces per placemat. Approx. 9.5 inches each but we can join pieces together if you only have shorter pieces. (My supermarket uses 3 inch wide papers).
Enough fabric scraps and off cuts to cover the receipts. Any shape will do.
5 matching pieces of fabric 1.5 inches X 9.5 inches for sashing and side border
strips.
2 pieces of the same fabric 1.5 inches X 16 inches for top and bottom borders.
Binding fabric. I used two leftover strips from a jelly
roll.
Piece of batting. 14 x 18. Franken batt is perfect for placemats.
A fat quarter for backing fabric, or a piece 15 X 19 inches.
Directions.
1) Shorten the stitch on your sewing machine and using the grocery receipts as foundation papers sew your scraps on to them. Don't worry if some of the scraps are not wide enough, you can sew two together before sewing them on. Once your paper foundations are covered, turn them over and use the edge of the paper as a guide and trim off the uneven edges of the fabric using a ruler and your rolling blade.


11 comments:
your mats look great. Thanks for the tutorial to make them.
I would if I could, Lou! But your instructions 'read' just fine.
Sorry I havn't the time - or the till receipts - to make them at the moment but your instructions make complete sense to me! xx
Very good . I’ll give it a go
Hi Lou, they look great! I would only add a tiny bit in step 1. The last sentence reads "Once your paper foundations are covered use the edge of the paper as a guide and trim off the uneven edges of the fabric." After the word 'covered' I would add.. 'turn your strips to the back and' otherwise you might have people wondering how. I write lots of instructions for beginning quilters and sometimes it is the little steps they need.
I love them.
Just a query. Why do you trim the backing and batting 1/4” larger all the way around?
I will have to try these but it will have to be after you tutorial sorry Lou. A bit on at the moment . Good luck
have fun with that tutorial and the girls..........
What a great tutorial! I really love these placemats and should be making some. We both eat dinner on a tray. Thanks for taking the time to write such a post, Lou.
Great placemats, such a wonderful idea for using up scraps.
Hugs, Tazzie
Yep, thanks for the tutorial. Here are my results https://jobutterfield.blogspot.com/2024/05/my-friday-was-spent-sewing.html
Post a Comment